
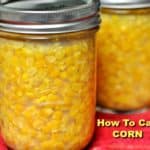
Learn how to can corn for long term storage! Enjoy having jars of home canned corn in your pantry to enjoy a taste of summer’s bounty all year round. 
Do you enjoy corn on the cob like we do? YUM! I get so excited when all the fresh picked corn on the cob hits our grocery stores and farmers markets each summer. It’s so delicious, and I’m really glad I learned how to can corn many years ago, so it can be preserved for long term storage!
Yep… I LOVE corn… on the cob, off the cob, and at the local county fair!

So Can I Learn How To Can Corn?
Sure. Anybody can learn how to can corn. You will need to have a pressure canner, however, because corn is a low-acid food. Low-acid foods must be cooked at a really high temperature (under pressure) to preserve it for long term storage. The high temperatures help destroy any bacteria present that could potentially harm you.
Before you begin working on the corn, gather your canning equipment, lids, canning jars, etc. and get them sanitized, heated, and ready to go, according to manufacturer instructions.
Prep The Corn
For each PINT jar, you will need approximately 4 medium long ears of fresh corn on the cob. Each QUART jar will need about 8 ears. So… figure out how many jars you want, and plan accordingly!
Remove the husks and the corn silk from each ear of corn, and rinse corn ears. Slice off the kernels into a large bowl, using a sharp, serrated knife.

Filling The Jars
There are TWO methods that can be used in canning corn… the HOT PACK and the RAW PACK method (I use the raw pack). Here are both methods:
- RAW PACK: Loosely pack the corn kernels into hot, prepared canning jars. being sure to leave a generous 1″ headspace in each jar. Do NOT press the corn down into the jar. Pour boiling water into each jar, and adjust headspace, if necessary to keep a 1″ headspace.
- HOT PACK: Measure the corn out into a large stainless steel saucepan. For every 4 cups of corn kernels, add 1 cup of boiling water. Turn heat under pan to medium-high. Bring liquid to boil. Once boiling, reduce heat, and boil (gently) for 5 minutes, to heat the corn through. Ladle the hot corn AND the cooking liquid into jars, leaving a 1″ headspace in each jar.

Remove the air bubbles from each jar, by inserting a plastic utensil into jars several times. Wipe the jar rims clean with a cloth (to help ensure a good seal). Place prepared flat lid on jars, then screw the ring band on until fingertip tight.

Carefully load the hot jars onto rack in the water in your prepared pressure canner. Lock the lid, and then bring the water to a boil over medium-high heat.
How Long to Process Jars
Let the steam vent for 10 minutes, and then close (or place cover on) the vent. Continue to heat until the pressure canner reaches 10 pounds pressure, and begin processing. Maintain this pressure throughout the processing time for the canned corn. Start the timing once the canner reaches 10 pounds pressure.
Process PINT jars (500 mL) for 55 minutes. Process QUART jars (1 L) for 85 minutes at 10 pounds pressure.

Once Processing Is Done
When processing time is complete, turn off the heat. Let the pressure drop NATURALLY to 0 on the pressure canner. Do NOT attempt to open the lid until pressure has completely dropped to 0!
Once the pressure gauge reaches 0, wait 2 minutes longer, then open the vent (or remove vent cover). Carefully remove the canner lid. Wait 10 more minutes, then carefully remove and transfer hot jars to a dish towel on counter. Don’t set boiling jars directly on counter, because temperature variances between hot jars and cool counter could cause jars to crack.
Let the jars cool for at least 12 hours (or overnight) without disturbing. Once completely cool, wipe jars clean, label, test the lids to ensure they have all properly sealed, and store them in your pantry.
TIP: To test seal, remove the screw band. Use a finger and press down in the center of the flat lid. There should be NO give at all if sealed correctly.

Hope you found it helpful learning how to can corn. I enjoy knowing I have quite a few jars of summer corn stored up in our pantry to use throughout the year! Have a great day.
Looking For More CANNING Recipes?
You can find all of my canning recipes in the Recipe Index, located at the top of the page. I have quite a few, including:
Interested In More Recipes?
Thank you for visiting this website. I appreciate you using some of your valuable time to do so. If you’re interested, I publish a newsletter 2 times per month (1st and 15th) with all the latest recipes, and other fun info. I would be honored to have you join our growing list of subscribers, so you never miss a great recipe!
There is a Newsletter subscription box on the top right side (or bottom) of each blog post, depending on the device you use, where you can easily submit your e-mail address (only) to be included in my mailing list.
You Can Also Find Me On Social Media:
Facebook page: The Grateful Girl Cooks!
Pinterest: The Grateful Girl Cooks!
Instagram: jbatthegratefulgirlcooks

Original recipe source: “Ball Complete Book of Home Preserving”, published 2012, The Jarden Corporation, pages 388 and 385.
How To Can Corn
Learn how to can corn for long term storage! Enjoy having jars of home canned corn in your pantry to enjoy a taste of summer’s bounty all year round.
- 12 ears corn on the cob ((large ears))
- 1½ teaspoons canning salt, (if using-optional) ((only use ½ teaspoon per jar))
-
Gather canning equipment, lids, canning jars, etc. and get them sanitized, heated, and ready to go, according to manufacturer instructions.
For each PINT jar, you will need approximately 4 medium long ears of fresh corn on the cob. Each QUART jar will need about 8 ears.
-
Remove husks and corn silk from corn, then rinse. Slice off kernels into a large bowl, using a sharp, serrated knife. There are TWO methods that can be used in canning corn:
RAW PACK: Loosely pack corn kernels into hot, prepared canning jars. leaving a generous 1″ headspace in each jar. Do NOT press the corn down into the jar. Pour boiling water into each jar, and adjust headspace, if necessary to keep a 1″ headspace.
HOT PACK: Measure corn into a large stainless steel saucepan. For every 4 cups of corn kernels, add 1 cup of boiling water. Turn heat under pan to medium-high. Bring liquid to boil. Once boiling, reduce heat, and boil (gently) for 5 minutes, to heat corn through. Ladle hot corn AND cooking liquid into jars, leaving a 1″ headspace in each jar.
-
Remove air bubbles from jars, by inserting a plastic utensil into jar several times. Wipe jar rims clean with a cloth (to help ensure a good seal). Place prepared flat lid on jars, then screw the ring band on until fingertip tight.
-
Load hot jars onto rack in water in prepared pressure canner. Lock lid, and then bring the water to a boil over medium-high heat. Let the steam vent for 10 minutes, and then close (or place cover on) the vent. Continue to heat until pressure canner reaches 10 pounds pressure, and begin processing. Maintain this pressure throughout processing time. Start the timer once canner reaches 10 pounds pressure. Process PINT jars (500 mL) for 55 minutes. Process QUART jars (1 L) for 85 minutes at 10 pounds pressure.
-
When processing is complete, turn off heat. Let pressure drop NATURALLY to 0 on the pressure canner. Do NOT attempt to open lid until pressure has completely dropped to 0! Once pressure reaches 0, wait 2 minutes longer, then open vent (or remove vent cover). Carefully remove canner lid. Wait 10 more minutes, then carefully remove and transfer hot jars to a dish towel on counter. Don’t set boiling jars directly on counter, because temperature variances between hot jars and cool counter could cause jars to crack. Let jars cool for 12 hours without disturbing. Once completely cool, wipe jars clean, label, test the lids to ensure they have all properly sealed, and store them in your pantry. TIP: To test seal, remove the screw band. Use a finger and press down in the center of the flat lid. There should be NO give at all if sealed correctly. If jar did not seal properly, store in refrigerator and use within a day or two.
Here’s one more to pin on your Pinterest boards!
The post How To Can Corn appeared first on The Grateful Girl Cooks!.
